Proper planting ensures a good start to a healthy landscape. The following guidelines for installing plants apply for sandy, well-drained soils.
Annuals and Perennials
Annuals and perennials are typically small (4”) to one gallon sized pots and last at least one season.

- Examine plants prior to purchasing. Check for signs of disease or insects. Check for roots that emerge from bottom of pot, which can indicate a root-bound plant.
- If desired, amend sandy soils with organic materials (such as compost). Work into soil 10-12 inches. It is best to amend the entire planting area, rather than just a single planting hole.
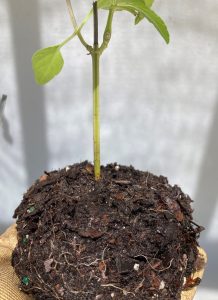
- Gently remove the plant from the container. A well-rooted plant will show roots that extend just to the interior of the pot. If there are circling roots, cut with a sharp knife.
- Dig hole so the height of the root ball is at – or slightly higher – than ground level when plant is installed. This allows for settling.
- Dig hole slightly wider than the root ball. The loosened soil will enhance lateral root development.
- The planting hole should have flat-shaped bottom; (avoids air pocket at bottom). Leave soil at bottom as undisturbed as possible (to discourage settling).
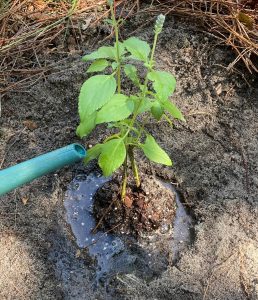
- Make sure root balls are well watered in; never plant a dry root ball.

- Place plant in the hole. Return the soil around root ball using a trowel or your hand. Do not press down or stomp on plants. Compacting the soil reduces oxygen that is necessary for root development. Water gently to remove air pockets.
- Avoid piling up soil around the center of the plant. If the plant seems unstable after installing, it was probably installed too high; best to remove and replant at proper height.
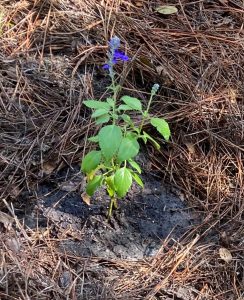
- Rake surrounding soil smooth and level, to allow for good drainage.
 When installing any size of plant, there are some general guidelines to follow.
1. Add mulch to 3” depth in the area surrounding the plant. If you would like to add mulch on top of the root ball, only apply to 1 inch depth.
2. Water the new plant well, making sure adequate water is applied during the plant’s establishment. This is determined by plant species, size of plant, and season.
3. No need to fertilize. Most plants have just come from the nursery and already have been recently fertilized. Additionally, adding fertilizer at planting has no impact on improved survival. In fact, if fertilizer is not applied correctly, roots may burn and injure the plant. Wait at least a few months before fertilizing trees and shrubs.
For more information, contact UF/IFAS Extension Polk County at (863) 519-1041 or visit us online at http://sfyl.ifas.ufl.edu/polk. The Plant Clinic is open Monday-Friday, 9:00 am-4:00 pm to answer your gardening and landscaping questions. Give us a call or email us at polkmg@ifas.ufl.edu.
If you are not in Polk County, Contact your local UF/IFAS Extension Master Gardener Volunteer Plant Clinic.
The Florida Master Gardener Volunteer Program is a volunteer-driven program that benefits UF/IFAS Extension and the citizens of Florida. The program extends the vision of the University of Florida/Institute of Food and Agricultural Sciences, all the while protecting and sustaining natural resources and environmental systems, enhancing the development of human resources, and improving the quality of human life through the development of knowledge in agricultural, human and natural resources and making that knowledge accessible.
This article was written by Master Gardener Volunteer Molly Griner under supervision of the Master Gardener Volunteer Coordinator and Residential Horticulture Extension Agent Anne Yasalonis.
An Equal Opportunity Institution.
Source: UF/IFAS Pest Alert
Note: All images and contents are the property of UF/IFAS.


